Showing posts with label recipes. Show all posts

Friday, March 6, 2015

Revamp & Haggis

I'm going to be trying to revamp the ol' blog here. I'd like to focus on more homeschooling stuff mixed in with homesteading, recipes, and writing. Heck, I know there are a ton of blogs out there that cover those things, but it's nice to get my ideas out in the open too. I write a lot at my history blog as well, so things might be sporadic here, but I'm going to try to keep it going!

Right now I'm preparing for a co-op class I'll be teaching - Holidays and Holy Days. Our first lesson is going to be about Robert Burns Night from Scotland. I've made some haggis (it's really good, people!) and shortbread. I was thinking we'd act out a mini Robert Burns Night, and I've got a craft planned for designing your own tartan! I hope it goes well.

I found a recipe for crock pot haggis. It uses ground beef and ground lamb with steel cut oats - pinhead oats as the Scots call it. It was a little fatty, but if you pair it with neeps and tatties (mashed golden turnips and mashed potatoes) it's wonderful! The combination of beef and lamb is good. If you're not used to lamb, it's a different sort of flavor to get used to, but I like it.

Crockpot Haggis

Here is the tartan design I made as an example using strips of cardstock over a sheet of plain cardstock.

I'm a huge fan of cardstock and loathe construction paper. If you want to keep a project, cardstock keeps its color and integrity much better over time than construction paper.

Wednesday, December 26, 2012

Snow Candy

We're into our second day of snow here in Maryland. A lot of it had melted by the end of yesterday; sadly our sledding tracks were mostly grass. But, today's snow storm has more than made up for it and we have plans in the works for an ultimate snow fort for bombarding people with snowballs who are sledding on the hill below. Mwahahahaha!

Our 2 year old daughter has been obsessed with eating snow. Any chance (and any place) she can get it, she will. I had to sit down with her and try to explain which snow not to eat (snow from the car, the house, shoes and the good ol' yellow or brown snow) and the snow that was good to eat. Then we had the idea of collecting some clean snow in a bowl as it fell and putting a bowl out on our porch railing, we soon had some good, clean snow to eat! We got out some spoons and she sat happily eating her bowl of snow. Our 5 year old son suggested we pour maple syrup on it, so we did that and he was happy eating his sherbet-tasting snow.

Then, I remembered as a girl trying to make Snow Candy using maple syrup like in Little House on in the Big Woods, but I was disappointed because it didn't work. The thing that I think was left out in our Snow Candy making was that we didn't boil it. And that's the key to making candy! So, I thought I'd give it a whirl today and it was a great success!

So here's how we made our candy:

I boiled about a 1/2 cup of pure maple syrup in a small pot over medium heat. I didn't really measure time-wise, but I stood there, occasionally stirring with a spoon. The syrup got all frothy and bubbly after awhile, so I added a tiny lump of butter which helped a little. That's optional though. I had a small bowl of cold water that I occasionally dropped a drip of the syrup into to test its hardness. Gradually it went from making soft lumps, to harder lumps, then to being hard and brittle - we had made it to the hard-ball stage! Then I removed it from the heat, got my bowl of snow and poured it out in a steady stream all over the snow. Surprisingly, it didn't melt the snow as much as I thought, but sunk slightly into the soft, white powder. When I removed it, it was a fun, hard spindly shape - delicious for eating!

I think it would be fun to try putting large drops on some parchment paper and letting them harden there. That way we'd have little syrup mounds to suck on. I'm thinking I could make some good throat lozenges this way with honey candy and some essential oils as well! Hmm!


This is the second pouring, so the snow is more melted.
Also, the candy cooked a little longer by that point, so it's darker.

Yummy, golden maple snow candy!

Happy Winter!

Saturday, November 10, 2012

Spaghetti Soup

I'm usually not a soup person, but with the cold turn in weather I have been craving something warm and soupy all the time. I'm sure it helps that our house is poorly insulated and is stinkin' cold. My husband's mom makes this spaghetti soup that his family really loves. I thought I'd give it a try with my own twist on it and came up with this:

Spaghetti Soup

1 large (28 oz. approx.) can of crushed tomatoes
1 lb. or less of ground beef or turkey, cooked and drained
2 cups of chicken or beef broth, approx. (depending on how thick or thin you like your soup)
1/2 medium onion, chopped
1 cup sliced mushrooms, optional
3 or 4 stalks of Swiss chard, washed and chopped - stalks and all (Swiss chard is like a happy medium between spinach and kale. I like it because it's tender like spinach - but not as wimpy, and cooks well like kale, but unlike kale, you can eat the stalks. And if you get the rainbow kind, they're really pretty! I love Swiss chard!)
Medium handful of spaghetti noodles, broken in three or four places so the noodles are short (Forgive me, Italians!)
1 tsp. minced garlic
1 Tbsp. Italian seasoning (rosemary, thyme, oregano, basil, etc.)
1 Tbsp. honey, agave, or brown sugar
dash of pepper and salt

1. In a medium pot heat on medium low the crushed tomatoes, cooked ground beef, and broth.

2. In a separate pan, saute the onions, garlic, mushrooms, and Swiss chard until the onions are tender and the Swiss chard is wilted. Add to the tomato sauce pan.

3. Add the broken spaghetti, spices, and sweetener and allow to simmer for about 20-30 minutes.

4. Serve with salad and garlic bread! Yummy!

You can also add whatever chopped up random veggies you have in your fridge like zucchini, cauliflower, carrots, or celery. I wouldn't recommend broccoli though, but I guess you could try it.

Monday, October 29, 2012

Autumny Foods & Halloween


I've been enjoying all the autumn foods! I made some Apple Cider Spiced Donuts and they turned out pretty tasty! I've got pureed pumpkin in the freezer just waiting to be made into a pie. As today is a little laid back (waiting out Hurricane Sandy), I did some online searches for Halloween food and found two I really liked:

Making All-Natural Halloween Popcorn Balls

Creepy (yet healthy!) Halloween Recipes

And as for some creepy Halloween things to watch here are my humble suggestions:

1. Shaun the Sheep - Little Sheep of Horrors

2. Wallace & Gromit - The Curse of the Were-Rabbit

3. Any Alfred Hitchcock

4. 13 Ghosts - the old school version

5. House on the Haunted Hill - old school

6. The Addams Family


Enjoy and have a Happy Halloween!

Tuesday, September 25, 2012

Late Summer Harvest


My garden is slowly winding itself down. It's looking very weedy and overgrown (in case you were wondering if I weeded or not. haha!) I harvested our popcorn and got two more pumpkins! There's been a slow trickle of peppers and red zebra-stripe tomatoes. The most exciting thing was that I dug up the potato plant I planted from a sprouting red potato in the compost and we got 3 potatoes! I love growing potatoes. They're just so fun to dig up!

I still have one more pumpkin on the vine, and some watermelons. How do you know when they're ripe? And the sweet potato that sprouted in my kitchen and I planted later has grown into a large, beautiful plant. I had to ask someone how to harvest them - I didn't even know! She said I had to dig them up, just like potatoes. I'm really excited to see what's down there.

I realized that I haven't posted a recipe for awhile so, here's my recipe for baking pumpkins and roasting pumpkin seeds!

Baked Pumpkin

- 1 Pumpkin Pie Pumpkin, Sugar Pumpkin, or any smallish pumpkin (the flavor is better than a large one)
- parchment paper

Set your oven to 375ºF to preheat. Line a jelly roll cookie sheet (the kind with a lip around the edge) or large cake pan with parchment paper.

Cut out around the stem and remove. Then slice your pumpkin in half. Scrape out the stringy pulp and seeds (save the seeds for toasting later). Don't worry about being too meticulous and getting every single string out. We're not carving a jack-o-lantern! Place the pumpkins, cut part down on the cookie sheet. Slide them into the oven and allow them to bake for about 1 hour or until a knife passes cleanly & easily through the tough skin and inner pulp without resistance. Take them out and allow to cool for an hour or two. .

Turn the pumpkins on their back and scrape out the pulp, gently scraping as close to the skin as you can to get as much pulp as you can. Place all the pulp in a bowl and mash with a potato masher until fairly smooth (there will still be some lumps.)

Now you're ready to bake! I made some Pumpkin Muffins and they were delicious!

Roasted Pumpkin Seeds

- seeds from your baked pumpkin
- olive oil
- salt

Grease a jelly pan cookie sheet (with a lip around it) with cooking spray or oil and set aside. You can use parchment paper instead if you'd like.

Place the pumpkin seeds in a colander and run a trickle of water over them as you remove the threads. The water will help the seeds slide through your fingers instead of sticking to them. Remove all the pulp and threads, preferable watching a Jane Austen movie. It's a tedious job! Once that's done, set your oven to 350ºF.

Shake the colander to drain as much water as you can and transfer the seeds to a bowl. Drizzle 2 -4 Tbsp. of olive oil over your pumpkin seeds. You might want more or less, but the goal is to make sure the seeds are coated well. Shake salt to taste over the seeds and mix thoroughly. Pop a seed in your mouth to make sure the salt ratio is enough (you don't have to chew it if you don't want!).

Once it's to your taste, spread the pumpkin seeds over the cookie sheet so that it is an even thickness. You want a single layer here, without much overlap of seeds so that they roast evenly. Put the seeds in the oven and roast for about 10 minutes. Stir the seeds and roast for an additional 10 minutes or until the seeds are golden and dry.

Enjoy them with the rest of that Jane Austen movie!

Wednesday, August 29, 2012

I just had to tell you....

that they were right. Bon Appetit magazine taught me how to make the best fried chicken of my LIFE. To be honest, I've actually never really like fried chicken. It was always too greasy with too much breading. Awhile back I posted the link to their recipe on how to make the best, life-changing fried chicken ever.

Oh. my. goodness.

Using their instructions and recipe, my very first batch was incredible!!!! The meat was juicy, tender, and flavorful; the breading light, crunchy, and seasoned perfectly.... I drool just thinking about it. I could hardly believe I had made it myself! (And my second time around, it was just as good!) I'd always heard making homemade fried chicken was nearly impossible or you had to have some southern great-aunt's famous recipe to do it. But no. Bon Appetit taught me all I needed to know. And I'll be forever grateful.

You should give it a try. Really. You'll thank me.

Here's the recipe.


They weren't lyin', folks!!!
All this talk... I need me some fried chicken right now.

P.S. Pssst! I even broke down a whole chicken all by myself for the first time in my life - just to make this recipe. Can you believe it?! I was so proud of myself! You can do it too! They have a good slide show of pictures here.

Friday, July 20, 2012

Tamale Pie

I'm always wary of vegetarian recipes. Even though I used to be vegetarian as a teenager, I now enjoy and actually like eating meat. I don't mind eating vegetables, in fact I sometimes like it. But I have this weird texture issue that gets in the way. We had stuffed zucchini a week or two ago and eating it made me want to gag! The flavor was nice, but there was just something about the texture. I don't know. It's weird. And especially frustrating when I'm making the effort to eat more vegetables.

I am also trying to make use of my bounty of cookbooks and saved magazine recipes by incorporating new recipes into every two-week menu I put together. Last night I tried a new recipe for Tamale Pie from one of my cookbooks A World of Wisdom. It was completely vegetarian, so I was a little concerned. My concern was a waste of energy, because it was freaking awesome! I couldn't stop thinking about it after dinner and I woke up being tempted to eat it for breakfast, it was that good. Haha!

So, of course I had to share the recipe. I added carrot and zucchini (because I have a lot from my garden!), but overall, I followed the recipe and was very happy with the results. I think the key is that the veggies are chopped up. Big chunks of veg just don't appeal to me. I am just so weird.

Tamale Pie

2 cups cooked preferred bean (I used black bean. It's my #1 fave!)
1/2 cup minced onion
1/2 cup chopped green bell pepper
1 chopped tomato
1/4 cup shredded zucchini (about half of a smallish-medium one)
1 shredded carrot
1/4 cup diced black olives
1 minced garlic clove
1 tsp. cumin
1 1/2 tsp. chili powder (more if you like it spicier)
1 tsp. dried oregano
salt and pepper to taste
1 cup shredded cheddar cheese
1 recipe of your favorite cornbread (The recipe should only fill one 8"x 8" or 9" round pan. I had to be specific because I have a recipe that fills a 9"x13" pan.)

Simmer beans, vegetables, and seasoning with a little liquid for 10 minutes in a skillet. Stir in half the cheese. Prepare the cornbread and pour half the batter into a greased 10-inch pie plate (deep dish) or 8-inch square dish and spread over the bottom. Add bean mixture on top, scooping it up with a slotted spoon to let any extra moisture drip out. (We don't want a soggy pie!). Top with remaining cornbread batter and spread out over the top the best you can. Bake at 425º F for 15 minutes. Top with remaining cheese and bake 10 minutes longer.*

*I didn't read this part of the recipe and just put the cheese on top at the beginning. I baked it for 15 minutes and it was done! And a huge bonus was that the cheese was all nice and brown and crusty on top. Mmmm! If you don't like it that way, follow the above directions and totally ignore the way I did it!

No garnish necessary. Just dig in and enjoy! And loosen your belt a little. You may go for seconds... or thirds....

Sunday, July 15, 2012

Homemade Ice Cream & Fruit Sorbet Recipe


Last year we bought one of those gel canister ice cream makers and have really loved it! Since we started experiencing that horrible heat wave, that gel canister is pretty much in the freezer all the time - just in case I want/need to make ice cream. (haha!) I just love the idea of throwing a few ingredients together (no junk like preservatives, dyes, fake flavors, or corn syrup!) and half an hour later we've got amazing homemade ice cream!

Last week I made this awesome vanilla mint Oreo (alas corn syrup!) ice cream. Oh MAN! Was that stuff delicious! For the peppermint I used 100% pure essential oil* and that was so refreshing - I could feel the mint cooling all the way down to my stomach. Aaah!

Okay, enough about that. Yesterday I made an apricot ginger sorbet that was absolutely delightful! I thought I'd share the recipe for a general fruit sorbet, because it has 4 ingredients and is so easy to make. If you don't have an ice cream maker yet, I'd strongly suggest you get one! (We have a Crofton brand and have been happy with it.)

Fruit Sorbet
(adapted from Nourished Kitchen blog)

2 lbs. fruit, such as strawberries, apricots, peaches, cherries, pineapples etc. halved & pitted or prepared appropriately (in other wise, ready to eat)
1/2 cup honey
3 cups water
1 tsp. vanilla

Bring the 3 cups of water to a boil. Add the fruit and honey and simmer until the fruit is tender. Transfer to a container and chill in the fridge until cold. (I did mine overnight.)

Transfer the fruit and liquid to a blender or food processor, add vanilla, and blend until smooth

Transfer to the ice cream maker and freeze according to the directions.

If you want a more solid sorbet, pour the soft-serve sorbet into a container and freeze until it's the hardness you want for scooping.

Enjoy any time of day, because really, it's just fruit!


The possibilities are endless! I can't wait to try a strawberry/mint sorbet. And I have cherries in my fridge right now. Ooooh, cherry sorbet! Mmmm!!!!

*Not all essential oils are consumable. Make sure the bottle does not say "For topical use only". I use doTerra oils which are 100% pure and are able to be ingested and used in cooking. 

Wednesday, March 21, 2012

Homemade Strikes Again!

So, I've been looking into replacing more things that I usually buy in a box with homemade recipes. And guess what?! You can totally make homemade instant pudding and homemade jello (using gelatin & juice)! These are way healthier alternatives and I am super excited to try the recipes out. Here are the webpages I got the recipes from.

Homemade Jello

http://www.cheeseslave.com/homemade-jello/
(You can find the pastured beef gelatin she mentions on Amazon. I've also heard you can use Agar Agar instead of an animal-based gelatin if you're vegetarian. This is derived from a variety of seaweeds.)

http://www.publicradio.org/columns/splendid-table/recipes/dessert_gelatin.html

Just think... any flavor of 100% bottled juice is your flavor of jello. How cool is that?! And don't leave out frozen juices when concocting your jello plans. My kids are going to love this!

One little side note - gelatin is actually very good for you and has many health benefits, including giving your body needed callogen (a skin builder). Jello that's healthy! haha! That is so crazy. But you know what? That's what homemade does for you, folks!

Homemade Instant Pudding

http://chickensintheroad.com/farm-bell-recipes/instant-vanilla-pudding-mix/

http://cheftessbakeresse.blogspot.com/2010/09/homemade-instant-pudding-mix.html

 I love that she recommends using flavored oils for all the interesting flavors you can find at the store. I was so worried I couldn't make homemade pistachio pudding, but now I can! Woohoo!


Wednesday, March 7, 2012

Healthy Eats for Kids


In recent years, I'll admit, I've developed a new soap box. What is it this time, you ask? Well, it's the kids' options on a restaurant menu. It's always the same: mac & cheese, pizza, or chicken nuggets. Yes, restaurants need to make money and feel they are forced to offer these things because kids are picky eaters. And YES my kids are some of the pickiest eaters that I know. But part of the skill of a chef is to take something people know and love and make it into something new and different right? Why can't they sneak in butternut squash with that mac & cheese?? Put spinach or zucchini on the pizza and offer fresh, homemade, whole chicken nuggets????? Don't answer those questions. Just let it stew. I've heard a good option is to order a lunch-sized portion of something off the menu for your kids. I just might do that next time. My son actually loves baked fish, non-breaded with just butter and some herbs. And this was a kid who it's taken 5 years for him to willingly eat chicken!

Okay, off the soap box now. This post is about finding alternatives for the same ol' same ol' that are healthy and delicious for kids. Every kid is different, and you know your kids best. These are some options that I have found that I am excited to try out. But first, here are a few tips I've learned:

1. Help your children grow some food.

My son was so much more excited to try basil on his pizza and as a pesto on pasta when he knew we had grown it ourselves and he had watched it sprout from a tiny seed and flourish as a wonderful smelling, beautiful plant. Also, my son has learned that there is nothing like picking your very own sun-warmed tomatoes or strawberries and popping into your mouth straight off the plant. Mmmm!

2. Involve your children in making their own food.

My son loves smelling all the herbs and spices I put into what I'm cooking or baking. Both my son and daughter love to measure and stir. Children naturally love to help and when they're able to stir, and knead, and make a mess (I've had to work really hard at putting my mess anxiety on the back burner!), they can take pride in having done something as big and important as creating their own snack or putting dinner on the table that the whole family enjoys. It's also fun bonding time with mom or dad in the kitchen which is usually the center of the home.

3. Have your food rules and stick with them.

It's taken my husband and I our entire son's life to develop rules for eating at the table. We're still working on it, and it's been a challenge with picky eaters. Some parents have the theory of "you have to eat everything on your plate" while others are more into experimentation on the child's part and they'll eat when they're hungry. I think we're somewhere in the middle. Lately, we've been having our son help with how much is going on his plate, so that he feels that he has some decision-making power there, but he doesn't get to choose what goes on his plate. I think educating him on what our bodies need for strength and energy has helped him understand that veggies, fruit, and proteins are more important than the dessert that may follow. It's a work in progress though. :-)

Whatever your feeding philosophy, I think when your kids know what is expected at the table, then meal times will probably go smoother.

Here are some great posts I found for kids' snack ideas:

45 Real Food Snacks for Kids

10 On-the-Go Healthy Snacks for Toddlers

25 Healthy Snacks for Little Ones

Also, I think having a few cookbooks in your arsenal can be a huge help. Here are two of my favorites:

Organically Raised: Conscious Cooking for Babies & Toddlers

Healthy Meals for Babies & Toddlers

One of my favorite ideas from the book Healthy Meals for Babies & Toddlers is for ready-made sandwich filling ideas. Most kids love sandwiches, heck, I love sandwiches and would try these super cool fillings any day:

Hummus
heaping 1/3 cup hummus
1 small cooked carrot, chopped
1 Tbsp chopped cucumber (you could substitute zucchini too)

Fruity Cheese Spread
heaping 1/3 cup lowfat soft cheese or ricotta cheese (I used neufchatal)
1 Tbsp. chopped pitted dates
2 Tbsp. chopped plumped dried apricots

Egg & Bacon
2 hard-boiled eggs, shelled and mashed
1 Tbsp mayonnaise (or Miracle Whip if you have my more refined taste buds haha!)
2 crisp-cooked slices bacon, chopped

A twist on the sandwich: my son loves a tortilla (white or whole wheat) with peanut butter and jam or honey and rolled up into a burrito. It's pretty good!


Monday, March 5, 2012

Homemade Hot Wings

My husband and I are big fans of hot wings. But we're not a fan of how expensive they are at restaurants. So, awhile back I set out on a mission to learn how to make them at home. I decided to bake them instead of frying them like they do at the restaurant, because I wanted to make a healthier version too. I also don't coat the wings in the sauce, but have the sauce on the side, which also reduces the potential calories consumed. After all, the sauce has a lot of butter!

Here's the step-by-step:

*** Caution: Raw chicken ahead! ***


Homemade Hot Wings
(You need a very sharp knife or kitchen shears. Kitchen shears work really well.)

Buy a big package of chicken wings and take out about 15-20. (I get mine at Costco.)
Cut off the wing tips at the joint.

Set aside the wing tips for making your homemade chicken stock.
(And don't forget when you're done eating the wings, to set aside the bones to add to this stock too!)

(Broth: Chicken extras, carrots, onions, bay leaves, celery, cover with water and simmer for a few hours.)

Lightly grease a large cooking pan and line up all the wings.

Cook at 375ºF until chicken is done - about 40-45 minutes. The internal temp needs to be at least 165ºF.
You might want to put the broiler on the last 5 minutes to get the skin crispy and brown.

Cue the Super Sauce and it's side kick Butter!
We like using Frank's Red Hot, which we get in big bottles at Costco. :-)

I'd say about 1/3 cup melted butter and 2/3 cup sauce to equal 1 cup.

You can dip your wings in the sauce, or serve them on the side along with your favorite ranch or blue cheese dressing. YUM!
Here's the full recipe:


Homemade Hot Wings

15-20 chicken wings
2/3 cup Franks Red Hot hot sauce
1/3 cup butter

Preheat the oven to 375ºF. Lightly spray or grease a large, medium depth pan. Remove the chicken wings from their package, rinse, and pat dry with a towel, paper or otherwise. Using kitchen shears, or a sharp knife, cut off the pointy wing tips at the joint where they bend. Set wing tips aside to make chicken stock.

Place the wings, sans tips, into the pan and bake for about 40-45 minutes or until the internal temperature of the wings registers at least at 165ºF. Turn the wings over and turn on the broil. Broil the wings for about 5 minutes to help the skin get a little more crispy and browned if they aren't already.

While the wings are on broil, prepare the sauce by melting 1/3 cup butter and mixing it with 2/3 cup of the hot sauce. Stir until blended well.

Serves the wings right away, by either dipping them in the sauce, or serving them with the sauce on the side. Also, serve with your favorite ranch or blue cheese dressing.

Enjoy the BURN! hahaha!

Tuesday, February 21, 2012

Cinnamon Butternut Squash Muffins

I've been trying to find subtle ways to sneak some squash into our diet. I really like the flavor of butternut squash, but I have a problem with the texture. Not to mention the rest of my family won't eat squash, even to be polite. So, when I found this recipe for Cinnamon Butternut Squash Muffins, I had to give them a try!

Boy, was I floored with how light and fluffy they were! The sweetness is very light and not overpowering like a lot of muffins out there. They could totally have passed for one of those delicious muffins you get at a bakery. And what a great way to use up butternut squash! Here is the recipe with a few of my adaptations:


Cinnamon Butternut Squash Muffins


1 banana, mashed
1 cup cooked and mashed butternut squash
4 eggs
1/3 cup applesauce*
1/3 cup white sugar*
6 Tablespoon canola or vegetable oil
1/2 teaspoon salt
1 teaspoon baking soda
2 teaspoon baking powder
2 teaspoon cinnamon
1 cup whole wheat flour
1 cup unbleached all-purpose flour

Optional Topping:
1 tsp cinnamon
1/4 cup brown sugar

*I think honey would be a great replacement. You could try 1/4 cup honey and keep the applesauce the same or do 1/3 cup honey and reduce the applesauce to 1/4 cup. I've just found that honey makes the batter more liquidy.

Directions
1. In stand mixer or mixing bowl, mix banana, butternut squash, eggs, applesauce, sugar, and oil, until well blended.
2. In separate mixing bowl, combine salt, baking soda, baking powder, cinnamon, wheat flour and white flour.
3. Add the dry ingredients into the wet ingredients and mix until batter forms.
4. Pour into greased baking cups or muffin tins, and sprinkle with brown sugar-cinnamon topping. Makes 18-24 regular size muffins, 48 mini muffins, or 12 regular muffins and 24 mini muffins.
5. Bake at 350. Regular size muffins for 16-18 minutes. Mini muffins for 13-15 minutes.


Monday, November 21, 2011

Turkey Yada Yada


Right now there are thousands of "new and improved" turkey recipes floating around on blogs and throughout the internet telling you how to make the most perfect, moist turkey. However, how many of those recipes are stress-free? How many require the turkey to be perfectly timed or executed with the stress hanging over your head that you may have dried out your bird and there will be no way to tell until carving time?

Well, believe it or not, I know a truly stress-free way of making turkey for the big Thanksgiving dinner. Pssst! And guess what? You can make it days in advance and have it amazingly delicious and JUICY on the big day! No kidding, I promise.

Amazing Crock Pot Turkey, My Mom's Style:

What you need:

- a raw, thawed turkey
- an oven baking bag (You can get special plastic bags at the store that you cook your turkey in that speed up the cooking big time. I had a medium turkey cook in an hour and a half! Reynolds is the only brand that I know of.)
- spices, salt & pepper
- crock pot/slow cooker

Two or three days before Thanksgiving - 

Mix up your favorite spices in a bowl. I usually put in a tablespoon each of rosemary, onion powder, thyme, cracked pepper, and whatever else I feel like throwing in there. You can even add celery seed or sage if you like. Keep in mind that whatever you add is what your turkey will taste like - not just the skin, but the meat too because we'll be using all the turkey juices to stew the meat in.

Add 1-2 teaspoons of salt according to taste and mix the spices up well.


Preheat your oven to 350ºF. Rinse off your turkey and be sure to remove any "extras" from inside the turkey's rib cage cavity. Save them though!


Place your turkey on a clean, non-wooden surface (Wood absorbs meat juices. Yikes!) and taking a handful of your spice mix, start lovingly rubbing it into your turkey's skin. Okay, it doesn't have to be lovingly. Vigourously rub your spice mix into your turkey's skin. Rub the turkey all over - on the bottom, under the wings - everywhere on the outside - until your spice rub has been used up.


Follow the directions for the oven baking bag (usually you have to put a tablespoon of flour in the bag and shake it around). Holding the turkey by its legs, place your turkey in the bag breast-side up, add in the extras you removed before, secure the tie, and place it in your baking pan. Make a few vent holes in the bag with scissors or a sharp knife.

Bake for 2 to 2 1/2 hours for a 12 to 16 lb. turkey, 2 1/2 to 3 hours for a 16 to 20 lb. turkey, and 3 to 3 1/3 hours for a 20 to 24 lb. turkey, or until the meat thermometer reads 180ºF.


Once the turkey is done baking, the leg should move easily in its socket. Allow the turkey to cool for a half hour to an hour. Have a large container very close by. Cut the bag and carefully remove the turkey to the holding container. Be careful! It may fall apart in transit. (This is years of experience talking!) Allow it to cool until it is comfortable to touch. In the meantime, pour all the juices into a large container, or a few smaller ones. Cover, and put these in the fridge.

Notice the fat floating on top of the broth?

Once the turkey is cool enough to touch, you'll need to debone it. That's right! No carving ritual here, people! Put the meat into containers and put it in the fridge.

And guess what? You're done! It's amazing! It's a miracle! Now sit back and relax with a warm apple cider.


The morning of the big day - 


Take out the container of juices. The fat will have risen to the top and solidified. Remove the fat and then put the jelly-fied juices into your crock pot. Next, remove your turkey meat and put it into the crock pot with the juices. Depending on when your dinner is, set your crock pot to low (think 4-6 hours) or high (think 2-3 hours). 


And now cackle with glee, because you are totally done! Your turkey will sit there simmering in its lovely herbed juices while you go skipping out of the kitchen to spend quality time with family. And come dinner time - ooooh, delicious juicy turkey! Trust me. You'll never go back to those carved slabs of cardboard again!
Mmm! Juicy turkey!


Happy Turkey Day (early - just like your crock pot turkey!)

*baking info: http://www.reynoldsovenbags.com/RDetails.aspx?id=906&cat=4

Friday, November 4, 2011

Cinnamon Rolls... For REAL

Sorry for the delay in posting. October was a crazy month. I know everyone says stuff like that, but no. Really. (My family and I went on a 2 week vacation which turned into a 4 week vacation because I had to get my appendix out and couldn't fly for 2 weeks.) But we're back home now! Whew!

And you know what I found out? October 5th is National Cinnamon Roll day in Denmark. Or was it Sweden? Anyway, the point is is that it's absolutely amazing that someone celebrates such a delectable breakfast food. (That's right it's breakfast!) I totally wanted to celebrate such an awesome holiday. Who wouldn't want to celebrate cinnamon rolls?!

Well, while we were on vacation in Utah, I went to a bread night with a friend of mine and this lady gave out the following recipe for the most amazing, soft, delicious rolls of the perfect, hold-in-your-hand size. Not too big, not too small. Did I say they were SOFT? Oh, they were divine! And the greatest part of this recipe is that you can convert it to a Raspberry Cream roll too. Ooooooohhhhh....

Cinnamon Rolls
By Cathy King & Shauna Flammer


2 cups scalded milk (heated just until it starts to steam)
1/2 cup butter
2 Tbsp. yeast
1/4 cup warm water
2 eggs
1 c. sugar
2 tsp. salt
1cup mashed potatoes (plain)
7 cups flour, approx.

1/2 cup butter, softened or melted
Brown sugar
Cinnamon

1. Pour scalded milk over butter and allow to cool to lukewarm. Soften yeast in warm water. Add to milk mixture along with the eggs, sugar, salt, mashed potatoes, and 4 cups of flour. Mix with a spoon until somewhat blended.

2. Dump the mixture onto a floured surface (a cookie sheet, baking mat, counter top, etc.) and with your hands, fold and gently knead in enough remaining flour until the dough is soft, but well mixed and the dough has lost its shine. The stickier the dough, the lighter the finished product will be. The dough will not be able to hold its shape in a nice neat ball like when you're making a loaf of bread. It should be a lot stickier and more like a blob. (I know this sounds crazy, but you'll just have to trust me. I didn't believe this recipe until I was making it and then it made a lot more sense.)

3. Put the dough on a floured cookie sheet, cover with a towel and allow to rise in a warm, draft-free place until doubled - or 45 minutes to an hour. The dough will be a lot less sticky as the yeast has eaten up a lot of that gluten. (This is what the lady said. It made sense, and it turned out that she was right about the less-stickiness part.) :-)

4. Roll dough in a rectangle 4" wide (ONLY 4" - you'll see why) and 1" thick. Spread with softened or melted butter, sprinkle with brown sugar to taste and cover the darn thing with tons of cinnamon, if you're like me at all and LOVE it. :-)

5. Take both sides of the 4" width and fold it to the center into thirds. (One side to the middle, the second side to the other side. I hope that makes sense!) Cut your rolls into 18 rolls using dental thread. You'll notice that they are nice little cinnamon rolls of the perfect size! Place them on a greased cookie sheet with sides (jelly roll pan) and cover. Let rise until doubled. Preheat oven to 350ºF. Bake for 20 minutes. Ice if desired. (I totally forgot to ice them, and they were still amazing!)

Icing: 4 cups powdered sugar, 1/2 cup softened butter, 1 tsp. vanilla, and 3 Tbsp. milk. Cream together powdered sugar and butter. Add the vanilla and milk. Mix until creamy.

Raspberry Cream Rolls


Make the rolls as directed above. When you get to step #4, instead of butter and cinnamon, spread on 4 oz. of very soft cream cheese, lightly sprinkle on white sugar to your taste, then spread on your favorite raspberry jam. Continue steps as above and then DEVOUR with delight!

Happy Rolling!

Tuesday, October 4, 2011

Life-Altering Bread!

Okay, maybe it's not that dramatic, but I just made this bread last night, and the following recipe really changed the way I think about homemade bread. Of course, I love homemade bread, but after a day or two, it starts to get dry and crumbly, and that makes it hard to compete with soft-for-weeks store-bought bread. Believe me, I try to fight those thoughts, but they come unbidden!

Well, this bread had such an amazing, fine crumb, and is so soft... I can cut it and the slice doesn't fall apart. It's beautiful!! Try this bread out. I think the secret is the egg.

Rich Honey Egg Bread


1 1/2 cups whole wheat flour
1 1/2 cups (or more) of unbleached all-purpose flour
1/4 cup honey
1 1/2 tsp. of salt
2 1/4 tsp. yeast (1 packet)
3/4 cup very warm water
2 Tbsp. oil
1 large egg
Butter, if desired

1. Mix the whole wheat flour, the salt and yeast in a large bowl. Add the honey to the warm water and stir until mostly dissolved. Add the water/honey mixture to the bowl with the flour. Beat with electric mixer on low speed 1 minute, scraping bowl frequently. Beat on medium speed 1 minute, scraping bowl frequently. Add egg; beat until smooth. Mix in the all-purpose flour and more, if needed, to make dough easy to handle.

2. Place dough on lightly floured surface. Knead about 10 minutes or until dough is smooth and springy. Place dough in a large, greased bowl, turning dough to grease all sides. Cover bowl loosely and let rise in warm place about 1 hour or until double. Dough is ready if indentation remains when touched.

3. Grease bottom and sides of a regular-sized bread loaf pan. Gently push fist into dough to deflate and knead a couple strokes. Pull dough into a tight log shape and place in the loaf pan. Cover loosely and let rise in warm place about 1 hour or until double.

4. Move oven rack to low position so that top of pan will be in center of oven. Heat oven to 375º. Bake 30 to 35 minutes or until the internal temperature reaches 190º and crust is a deep golden brown. Remove from pan to wire rack and brush loaf with butter; cool. AND EAT! Mmmmm!!!

*Adapted from a Betty Crocker recipe.

Friday, August 12, 2011

Coconut Rainbow Muffins

The real name for this recipe is: Coconut-Cherry-Carrot-Zucchini Muffins. Quite a mouthful! But I changed the name because my favorite thing about these muffins is... it's like biting into a rainbow! Who wouldn't want to do that?!?

I love these muffins. They're soft and moist, even when they're a couple days old! You have to make these babies. Even just to be able to say you've eaten a rainbow. But if the leprechauns come chasing after you, don't blame me.

Coconut Rainbow Muffins

2 1/2 cups unbleached flour
1 cup sugar (you can use honey, just be sure to alter the baking soda and liquid measurements)
1 tsp. baking powder
1 tsp. baking soda
1/2 tsp. mace (or nutmeg... mace is expensivo!)
1/4 tsp. salt

3 beaten eggs
1/2 cup cooking oil (or 1/4 cup oil &1/4 cup applesauce for less fat)
1/2 cup milk (you may need a little more. it's kind of a stiff batter)

1 1/2 cups finely shredded carrots
1 1/3 cups flaked, unsweetened coconut
1/2 cup finely shredded zucchini (including peel for that pretty green color)
1/2 cup chopped, well-drained maraschino cherries

1. Preheat oven to 350ºF.
2. Grease 2 muffin tins with cooking spray.
3. Mix together dry ingredients in a medium bowl.
4. In a separate smaller bowl, combine the eggs, oil, and milk.
5. Add the wet to the dry ingredients and stir until well combined. Fold in the carrots, coconut, zucchini, and cherries. If the batter is too stiff, add a little more milk.
6. Distribute the batter evenly between the two muffin pans.
7. Bake for 18-20 minutes, or until a toothpick comes out clean. Remove the muffins from the cups and allow to cool on cooling racks. Enjoy for breakfast, snack, or any time!

Once completely cool, store and refrigerate the extra muffins in a sealed container. Makes 24.

Happy Rainbow Muffin!

Thursday, July 14, 2011

Root Beer Sherbet

Do you love root beer? Do you love ice cream? Do you love root beer floats?

If you answered yes to any or all of those questions, then you have to make this stuff. Yes, you have to!

We tried making this in our ice cream maker and since it was our first time using our ice cream maker, somehow it didn't turn out. Undaunted, we just poured the mix into a baggie, froze it and then scraped it out. It was uber crystallized, but it didn't matter. This stuff is amazing. It takes like a frozen root beer float. HEAVEN! 


Root Beer Sherbet


2 – 12 oz bottles of GOOD root beer (Virgil's is an excellent choice. No corn syrup too!)
1/2 cup sweetened condensed milk
1 cup whole milk or half and half

Open the root beer and let it sit in the fridge to get a little flat and get well chilled. Make sure all your other ingredients are chilled too. Mix up all the ingredients. Let the foam die down a little.

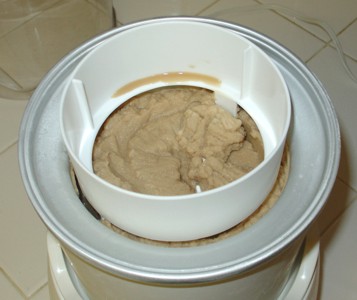
Pour into your prepared ice cream maker. It takes about 20 – 30 minutes, I’d say. Enjoy it pure and plain with a honkin' big spoon. Nothing else needed but a bowl. Or you could just eat it out of the ice cream maker. It's up to you.
rbs
From JustJenn Recipes with my own comments added in. :-)


Sunday, June 19, 2011

Sugar Alternatives

I've been working to eliminate corn syrup from our diet. The movie King Corn helped this desire along. They have a section in the movie where the two guys who are hosts of the documentary try to duplicate the process it takes to make corn syrup. It's a tricky food science feat with obscure chemicals added to succeed; chemicals that I personally have never heard of before. And yet corn syrup, now so much cheaper than cane sugar, not to mention honey or maple syrup, has found its way into almost everything, even spaghetti sauce and bread!

Recently I ran across a corn syrup alternative. I've known you could use honey in place of corn syrup, but if you don't want that honey flavor in what you're making, here's another option:

1 cup sugar + 2 cups water. Cook til thick.

And there you go! Corn syrup replacement!

If you're looking to replace cane sugar with honey in baking, here is a helpful conversion:

Use 3/4 cup + 1 Tbsp. honey in place of 1 cup sugar, then subtract 2 Tbsp. of liquid from the recipe. (since honey is liquid and sugar is dry) "Unless the recipe calls for sour cream or buttermilk, add a pinch of baking soda to neutralize the acidity."

http://allrecipes.com/HowTo/baking-with-sugar-and-sugar-substitutes/detail.aspx

The above link is where I got some info and has other sugar alternatives/substitutes to use in baking.

Friday, May 20, 2011

Blueberry-Rhubarb Crumble

This recipe is the best late-spring recipe! I was excited to get some rhubarb at the farmer's market and remembered this as my favorite recipe to use it in. I was short on rhubarb and frozen blueberries, so the rest of the fruit I added were strawberries I had taking up room in the freezer. Boy, was it yummy! Experiment with your favorite seasonal fruit on this one!

Blueberry-Rhubarb Crumble*

6 c. fresh or frozen blueberries
4 c. diced rhubarb
1 c. sugar
1/4 c. all-purpose flour

Topping
1 c. quick oats
1 c. packed brown sugar
1/2 c. all-purpose flour
1/2 tsp. nutmeg
1/2 tsp. cardamom
1/2 tsp. cinnamon
1/2 tsp. salt
1/2 c. cold butter

Combine blueberries, rhubarb, sugar and flour. Transfer to a greased 13x9-inch baking pan.

Topping: combine oats, brown sugar, flour, nutmeg, cardamom, cinnamon, and salt. Cut in butter until crumbly. Sprinkle over fruit mixture.

Bake at 350º for 45-55 minutes or until fruit is bubbly and topping is golden brown. Let cool 10 minutes. Serve warm w/ whipped cream or ice cream. (Also good at room temperature!)

*Adapted from a Taste of Home recipe, Aug/Sept 2009 issue

Monday, May 16, 2011

Cornmeal Molasses Pancakes

You may have read before of my failed attempt to turn sour milk into yogurt. Well, I had some more sour milk on my hands. It seems the wonderful grass-fed organic cows milk we buy goes sour if we don't drink it fast enough. (Since my son is now lactose-intolerant, we don't go through milk as fast as we used to.) This is a good thing, actually, because I never buy buttermilk. I'm too lazy, I guess, and I never use it all in time. This is where the sour milk comes in!

I was looking for a way to use my sour milk, which can be used in place of buttermilk. I forgot I had printed off this recipe for Cornmeal Molasses Pancakes and so I gave it a whirl for breakfast this morning. Whoa! It was amazing! This is a delicious variation on pancakes if you're looking to change it up a bit. We drizzled on some pure maple syrup and I was in heaven! It helps that I absolutely adore cornmeal. (And just a note - the molasses does not come out strongly. It just adds a deeper flavor to the mix.) The cornmeal gives it a lovely texture too. Mmmm!

Cornmeal Molasses Pancakes

adapted from recipezaar
makes 16-20 pancakes

1 large egg
1 1/4 cup buttermilk (or sour milk)
1 generous Tbsp. dark molasses
1 tsp. vanilla extract
1/4 cup unsalted butter, melted and cooled slightly
1 cup all-purpose flour
1/2 tsp. salt
1/2 tsp. baking soda
2 tsp. baking powder
1/2 cup yellow cornmeal

In a small bowl, whisk together egg, buttermilk, molasses, vanilla extract and butter. Set aside.
In a medium bowl, whisk together flour, salt, baking soda, and baking powder.
Add the wet ingredients to the dry ingredients and stir to combine.
Add the cornmeal and stir until just mixed. The batter may be a bit lumpy. That's ok.
Drop 2 tablespoonfuls of batter onto a hot, greased griddle, or cast iron skillet.
Flip when browned and cook through. Place on an oven proof plate in a 200ºF oven to keep pancakes warm while you cook the rest of the batter.

Serve with butter and maple syrup, molasses, honey, or blackberry syrup. Yipee!
Related Posts Plugin for WordPress, Blogger...